Accept payments
Choose how customers pay, online through Mollie or by bank transfer or cash, and set your currency, VAT and invoices.
On this page
The Payments app decides how customers pay on your website. Your web shop and your bookings both use it, with the same settings. The AI adds it when it adds a shop. Not in your list of apps? Select the plus next to Apps and, on the Payments card, select Add.
In the side menu, select Apps, then Payments. The window has three tabs: Settings, Payments and Invoices. After a change on Settings, select Save settings.
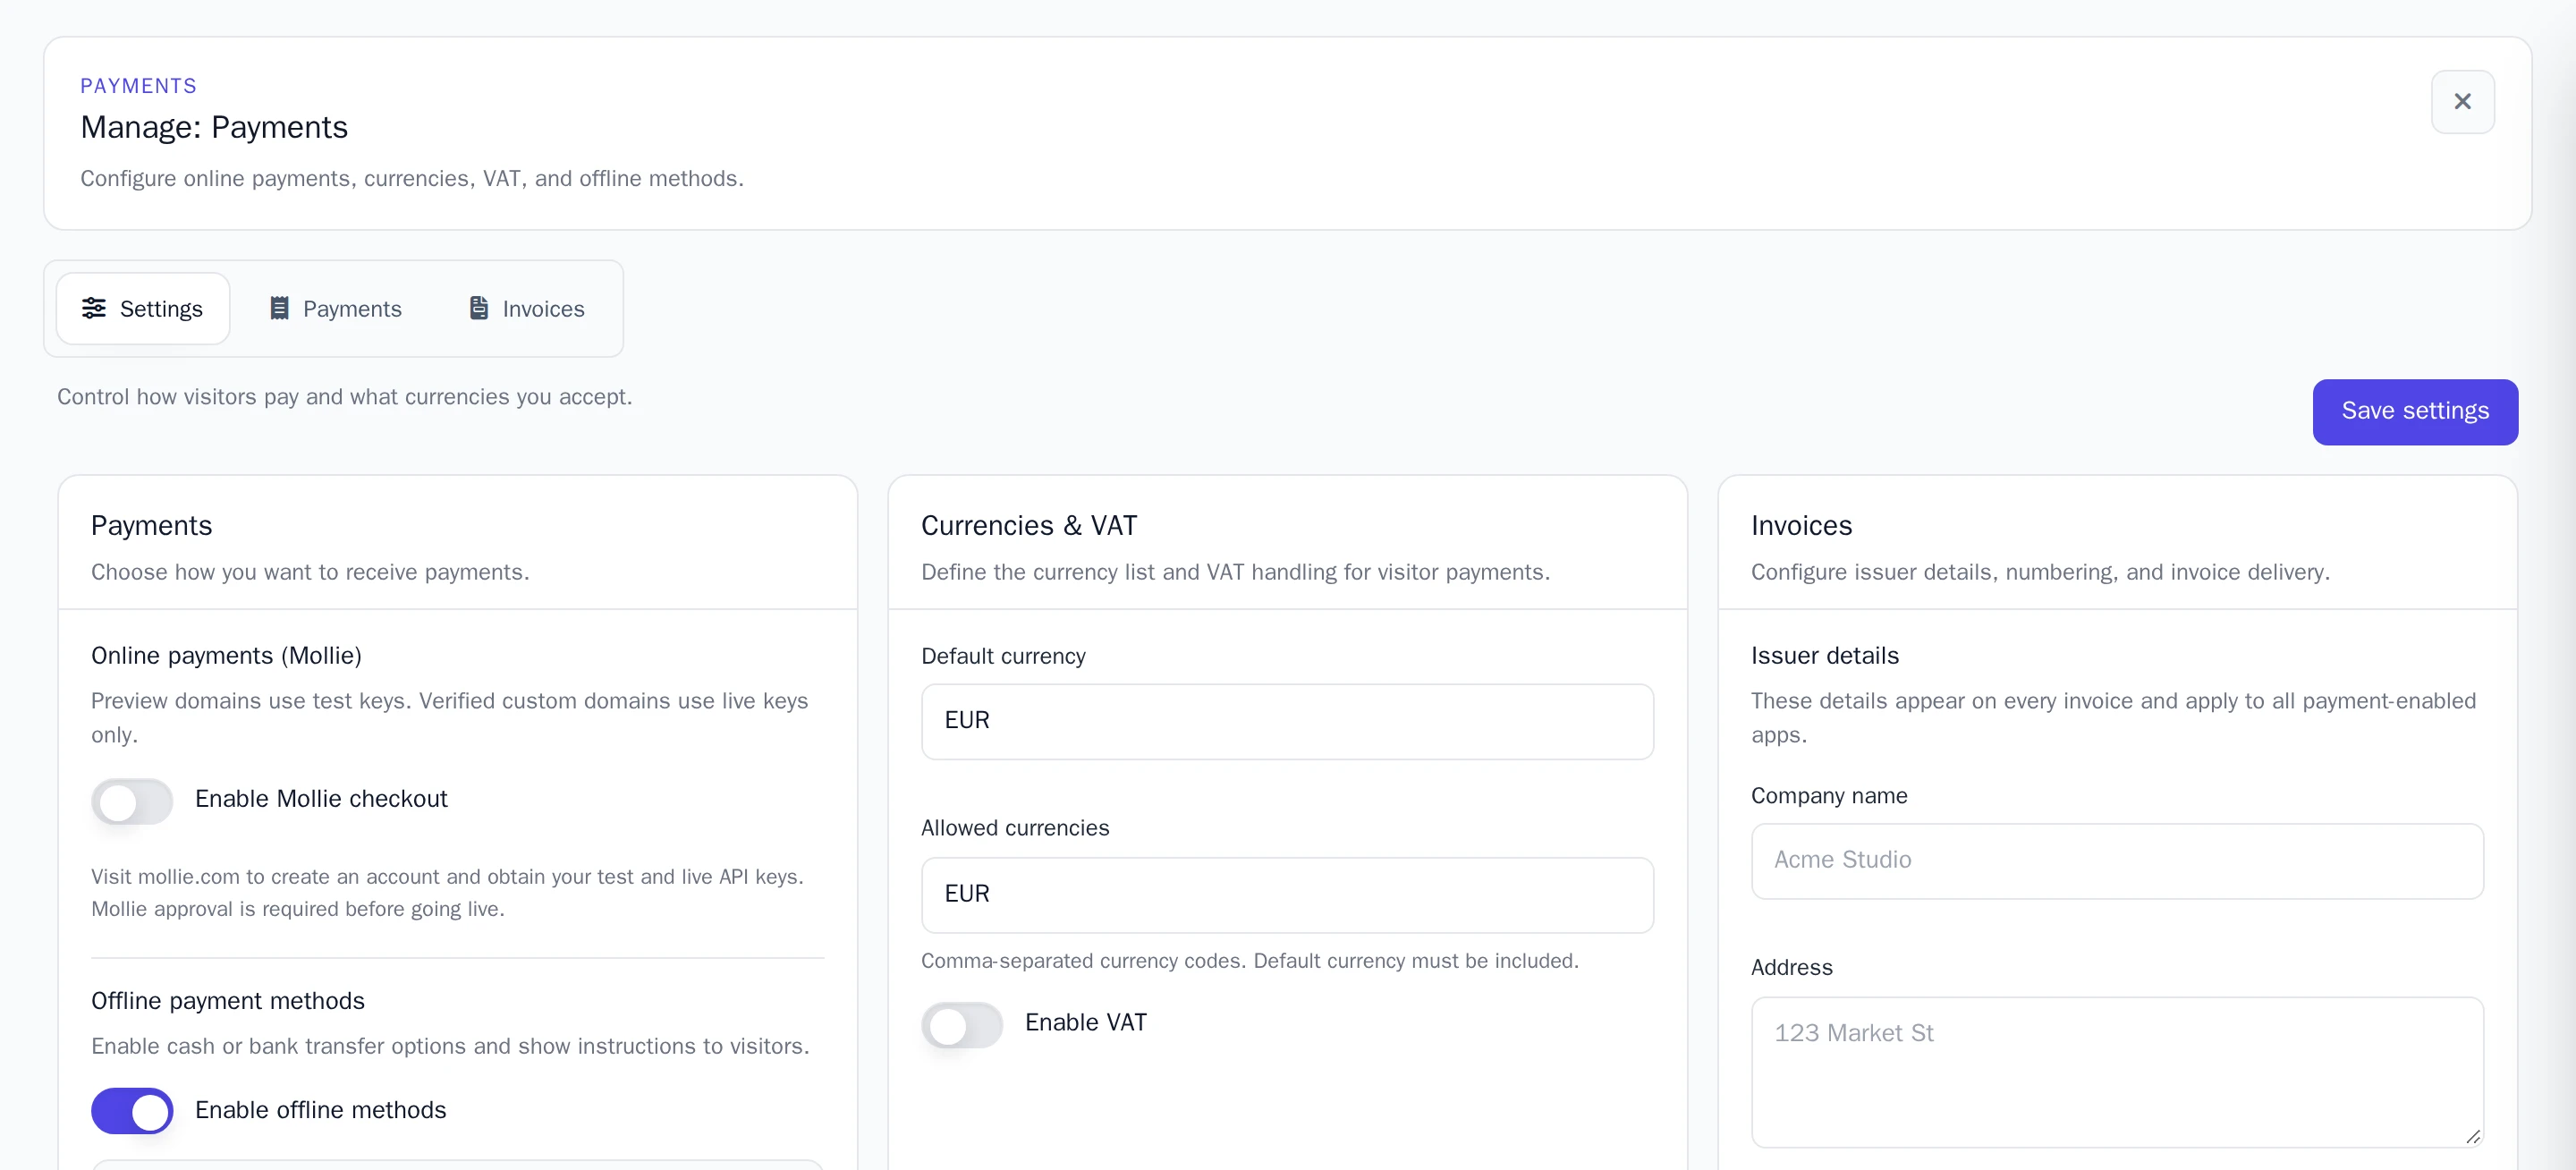
You choose one of two ways: online through Mollie, or bank transfer and cash. Turning on one turns off the other.
Online, through Mollie
Customers pay with iDEAL, a card and more. You need your own account at Mollie, the payment company, and the money goes straight to it.
- Make an account at mollie.com. Mollie checks your business before you can receive real payments.
- In your Mollie dashboard, copy your test and live API keys.
- Under Online payments (Mollie), turn on Enable Mollie checkout.
- Fill in the Test API key and the Live API key, and save. A saved key shows Configured. To keep it, leave the field empty next time.
Which key your website uses depends on its address:
- On your free Wobbio address, the test key. You can try the checkout without paying real money. Test payments only work from the internet addresses (IP addresses) under Test allowlist: turn on Add current IP and save to add the one you are on now.
- On your own domain, the live key, and customers really pay. This only works once your domain is verified: see Connect your own domain.
Mollie payments update by themselves when the customer has paid. To give money back, refund the payment in your Mollie dashboard.
By bank transfer or cash
Customers order or book and see your instructions for paying you. Nothing is paid on the website.
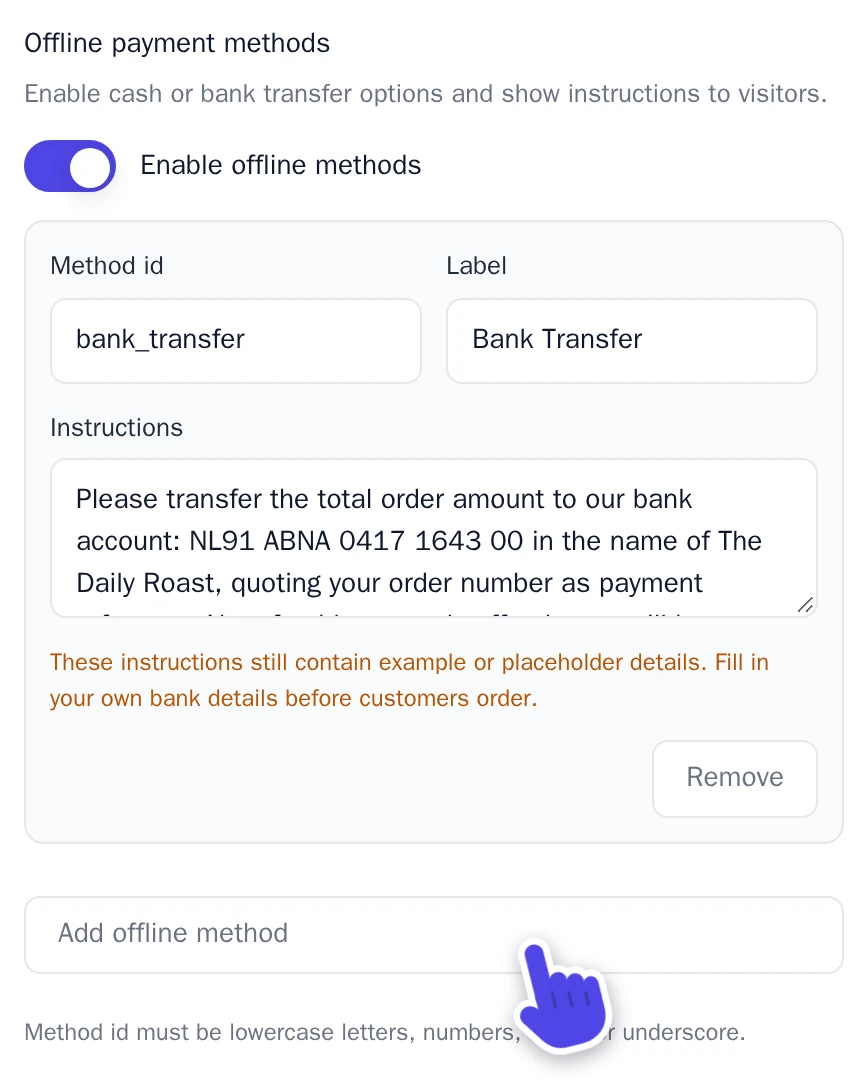
- Under Offline payment methods, turn on Enable offline methods.
- Each method has a Label, which customers see, and Instructions. Write how customers pay you, for example your bank account and what to put in the description.
- Select Add offline method for another way, or Remove for one you don't offer. A new method also needs a Method id, like
bank_transfer: lowercase letters, numbers,-or_. Without it, the method isn't saved.
Mark a payment as paid
A bank transfer or cash payment stays Pending offline until you have the money. Check your bank account, then mark it as paid where it came in:
- A shop order: open the order and select Mark as paid. See Sell online with a web shop.
- A booking: open it with Details and select Mark paid. See Take bookings and appointments.
The payment is then Paid, and its invoice is made. See Invoices.
Currency and VAT
Under Currencies & VAT:
- Default currency: for example EUR.
- Allowed currencies: customers can only pay in these. The default currency must be one of them.
- Enable VAT: fill in the VAT percent. With Prices already include VAT on, the VAT is part of your prices. With it off, it is added on top.
Invoices
When a payment is paid, Wobbio makes an invoice and emails it to the customer. A refund gets a Credit note. Under Invoices, set:
- Issuer details: your company name, address and other details on every invoice.
- Invoice number prefix and Invoice language.
- Auto-send invoices when paid: turn it off to send invoices yourself.
- Send a copy to the project owner: get a copy at one of your verified email addresses.
On the Invoices tab you can Download, Send or Edit each invoice. For your bookkeeping, choose two dates and select Download range to get all invoices in one zip file.
Every payment, from your shop and your bookings, is on the Payments tab.